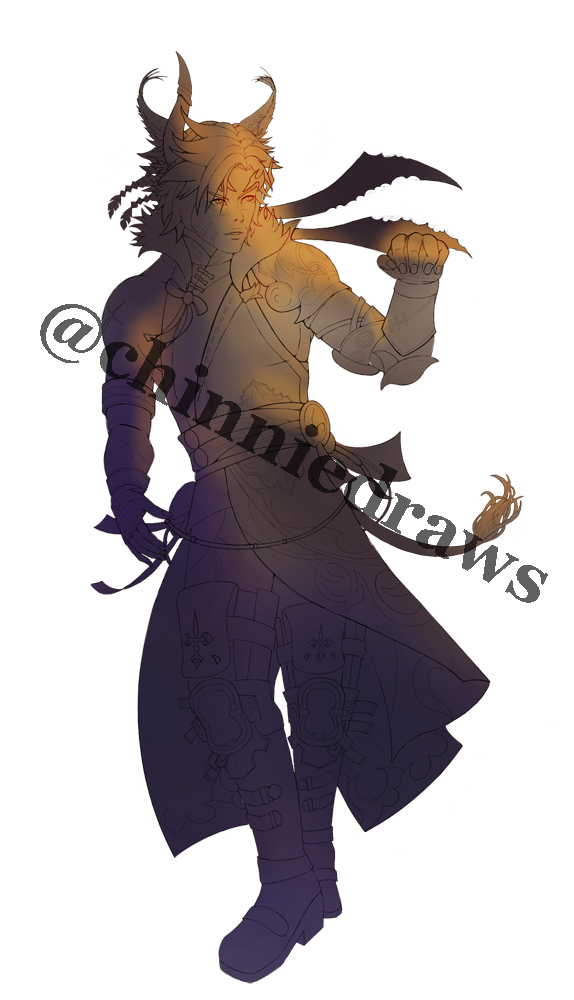
Overall figure drawing process:
Get reference picture(s) of the character we want to draw.
Do a warm-up drawing – 30 secs to 1 minute gesture drawing of various poses, about 10 or so of them. Don’t worry about capturing too much details, but do focus on capturing the motion and intent as quickly as possible. There are some website that offer reference pictures with timer, such as:
https://www.bodiesinmotion.photo/
http://reference.sketchdaily.net/en
https://x6ud.github.io/pose-search/#/
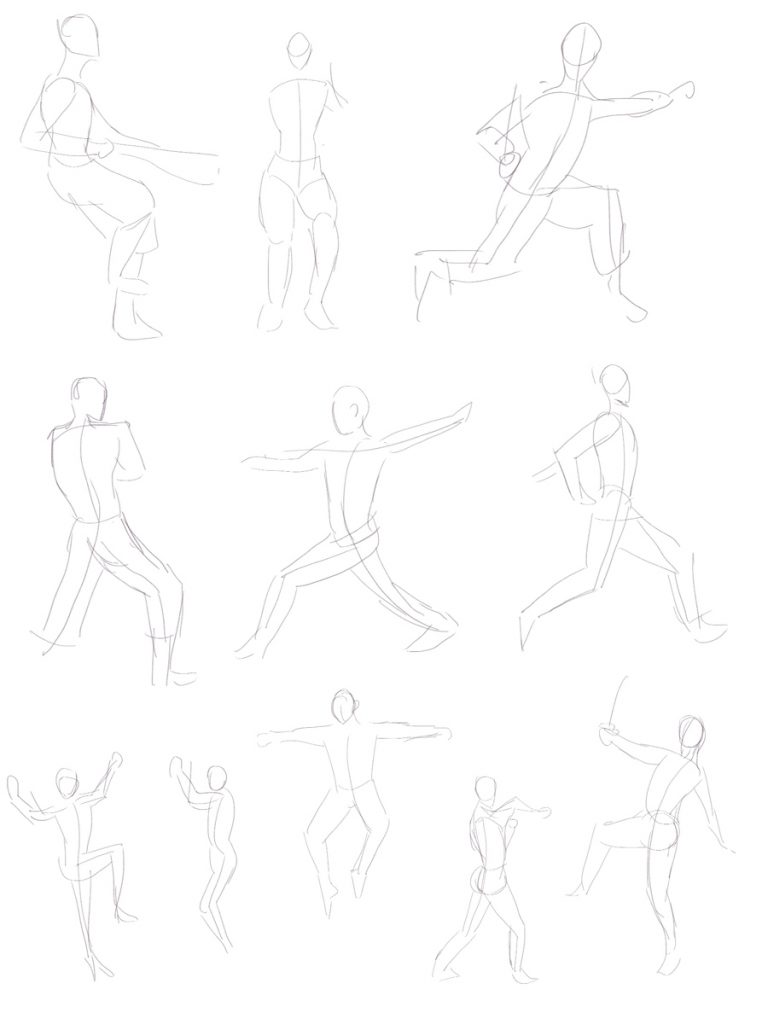
Brainstorm session – longer dynamic pose study, around 2 mins per pose. This time, try to get as much pose that look interesting. Do around 5 to 10 poses.
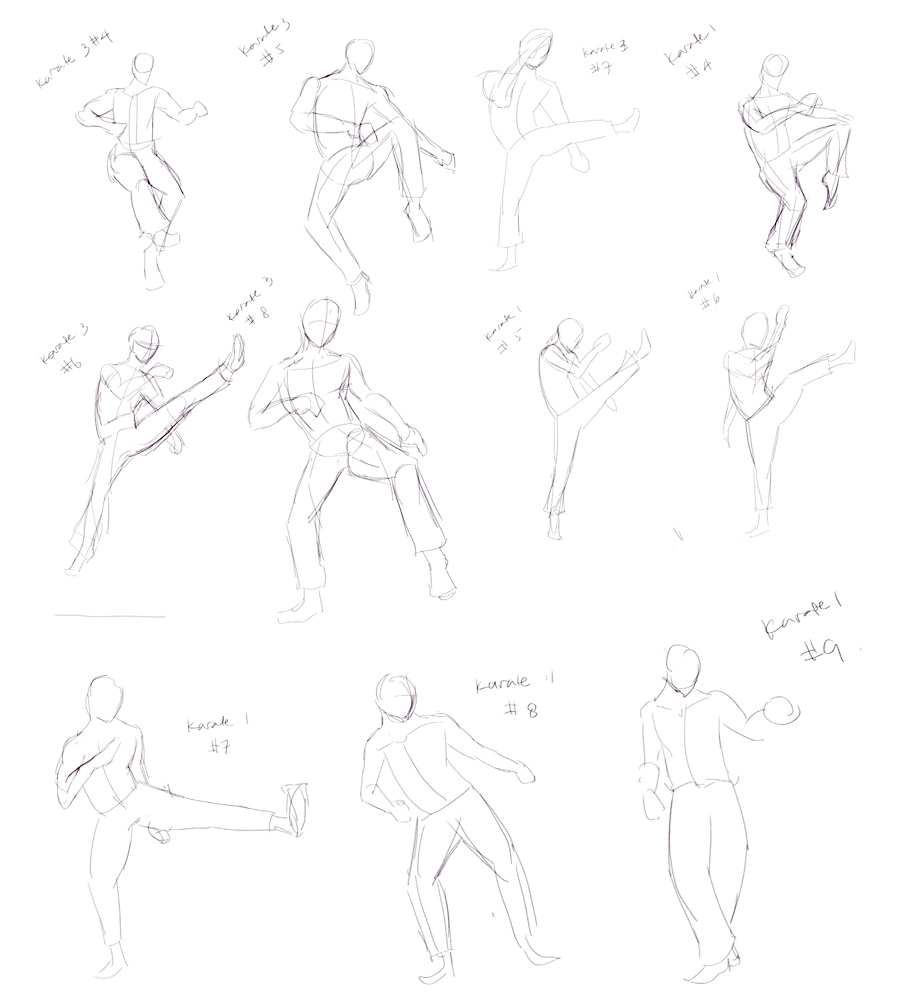
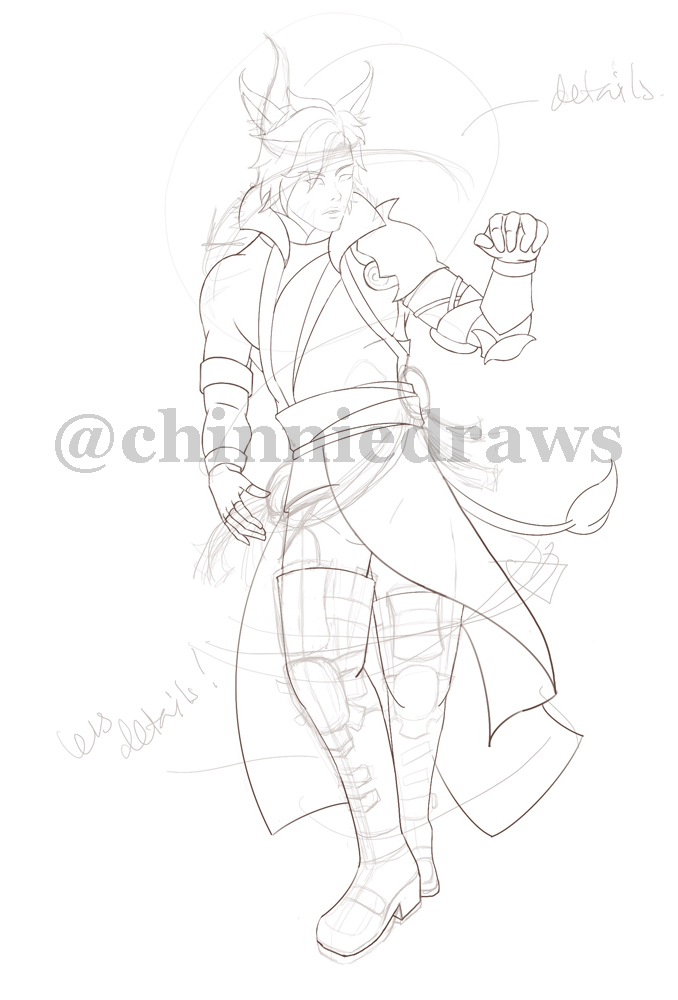
Pick the most interesting poses from previous session. We can narrow down to 4-5 poses. Look at our character reference pictures, and sketch them in these poses. Draw each pose on a separate layer.
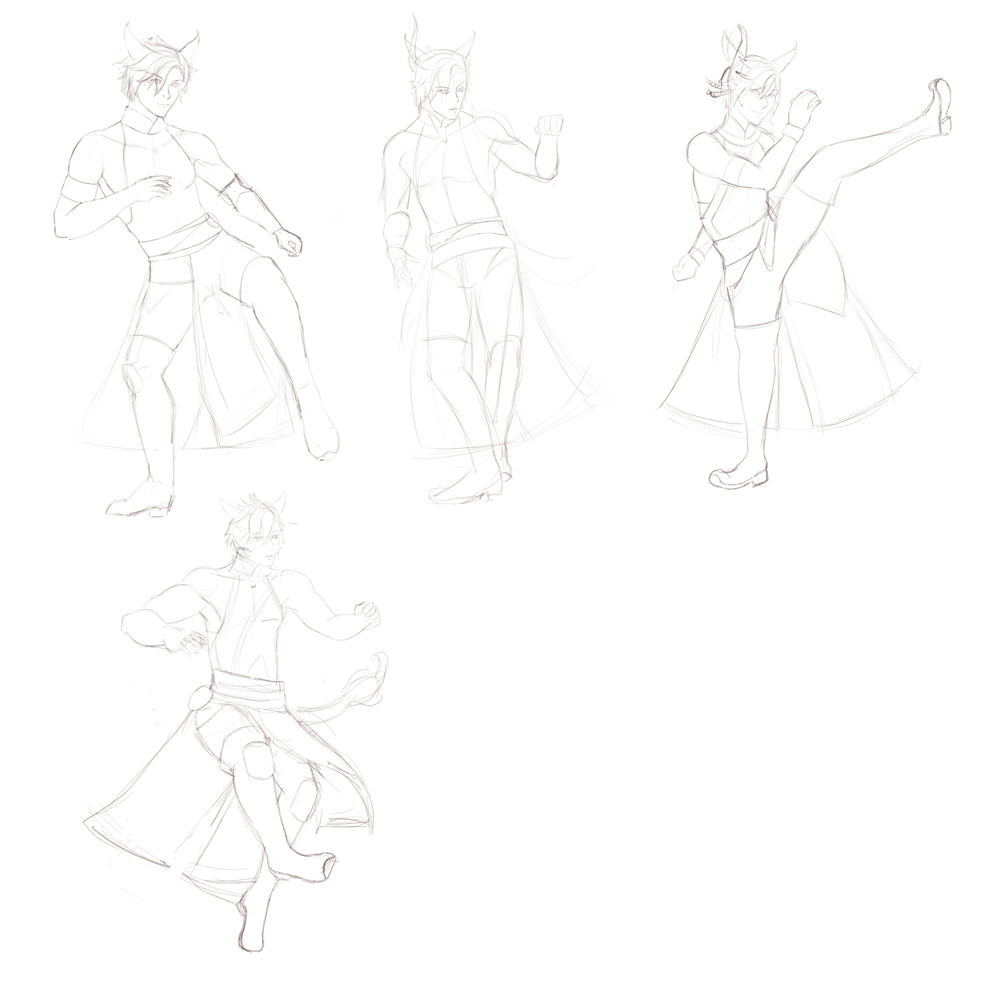
Once done, pick the top 1-2 most interesting sketch(es). Do clean up sketch on new layer, but don’t get hung up on small details. Focus on the big shape before going to smaller details.
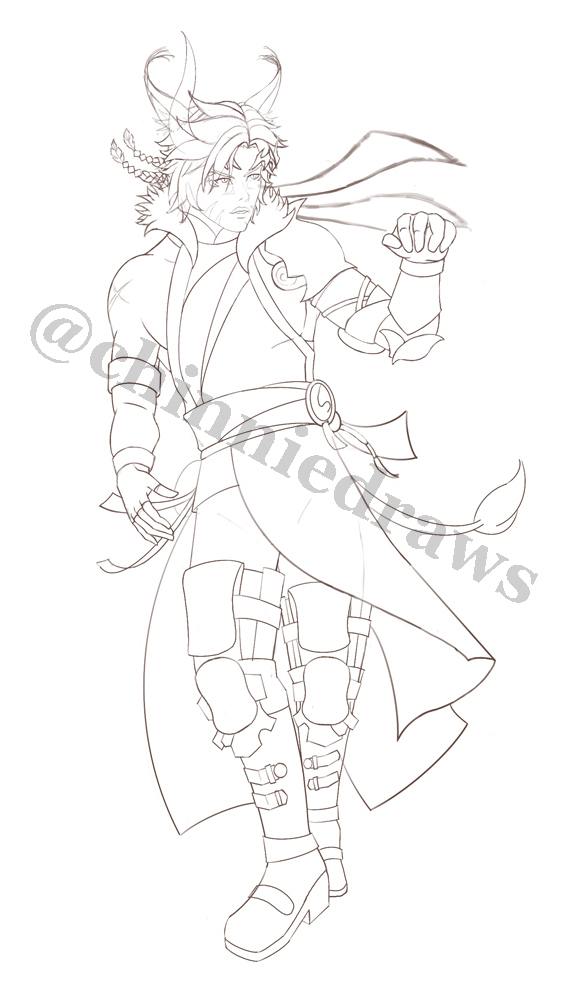
If we want to do line-art, start doing line art on a new layer, based off the clean-up sketch.
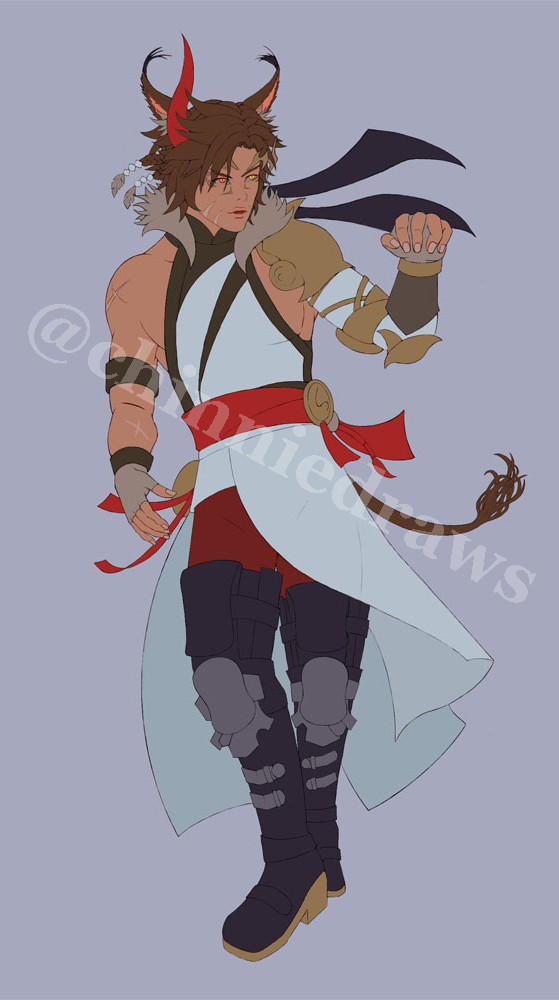
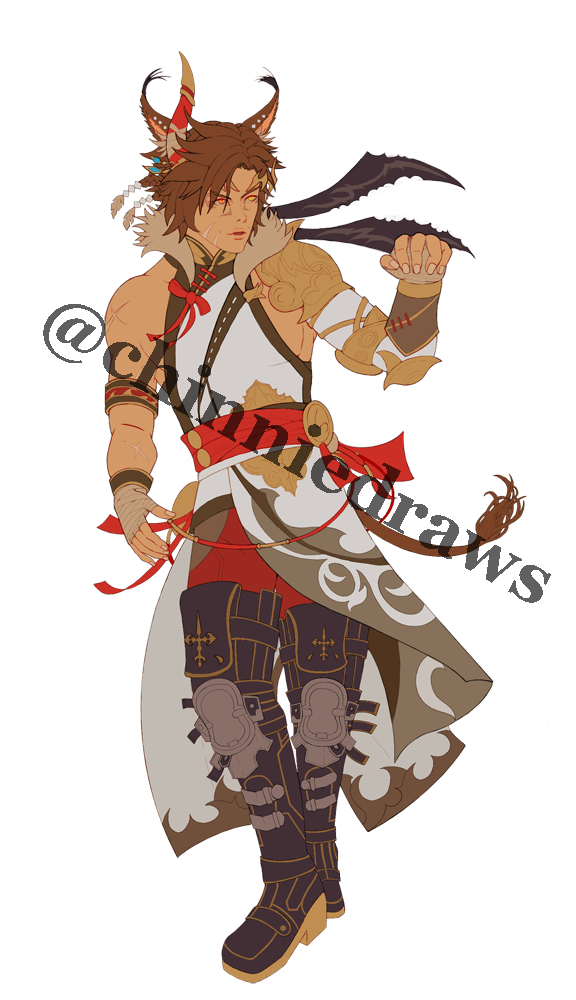
On new layer, apply (local) flat colors on the character. Again, focus on big shape and less on the detail. I usually do a layer for skin, a layer for clothing, a layer for hair, and a layer for extra details.
On a new layer, do initial environment lighting test. We will talk about this in more detail later. I like to start with the shadows, then lights, then high-lights.
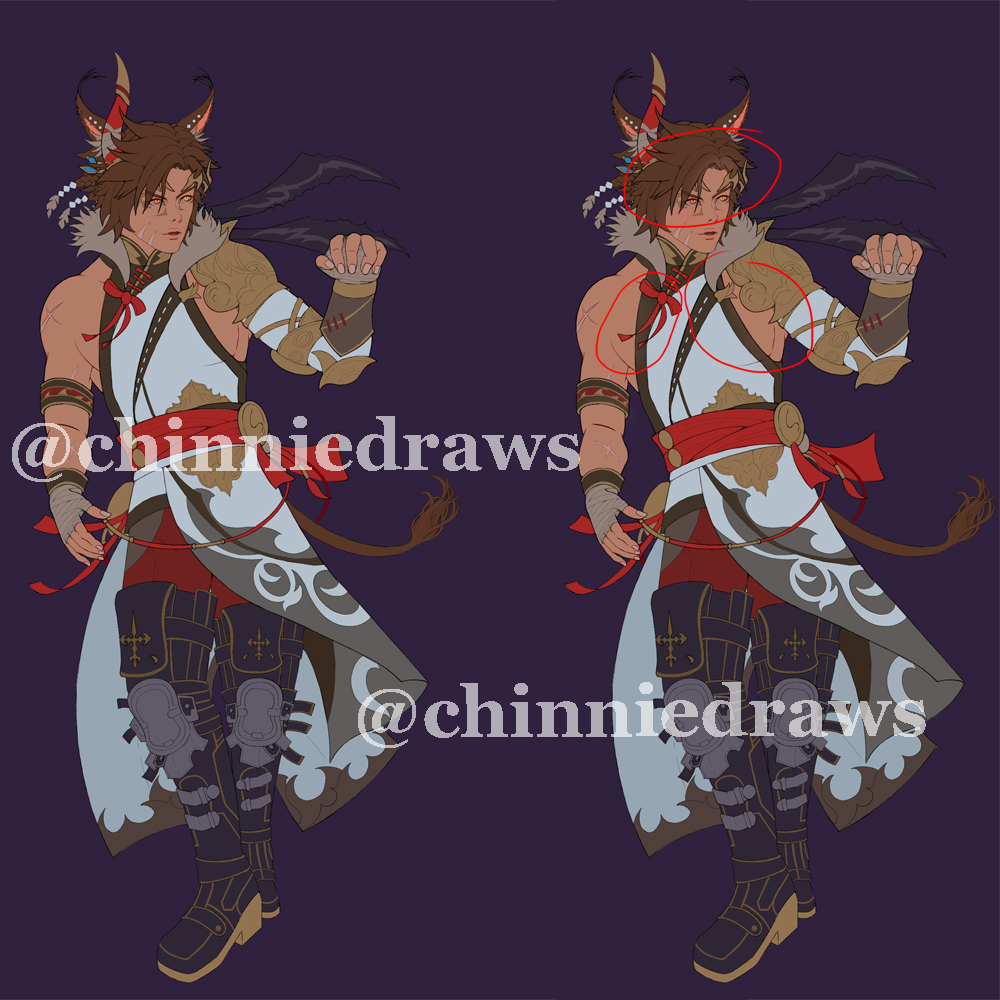
Hide the lighting layer(s). I go back to line art and flat color layers, and start adding the details at this point. Don’t forget to clean up and adjust the line art and flat colors.
Create a new layer on top of flat color and add bounce reflection from the skin and clothing. This should be very subtle.
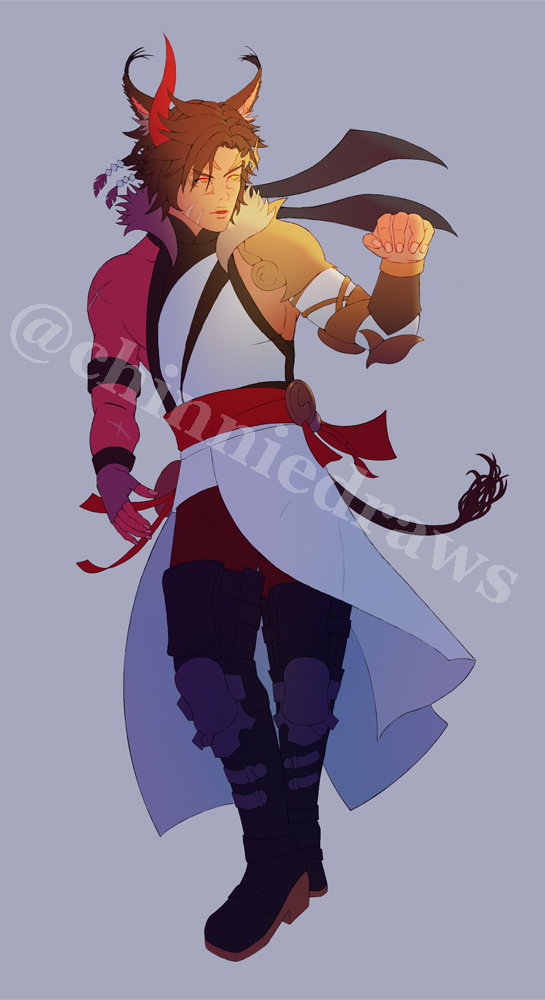
Turn on the lighting layers, and make adjustment on the other layers as needed.
Do final touch up, like adding effects and background.
Now is the fun part, the lazy lighting process.
Lighting Process:
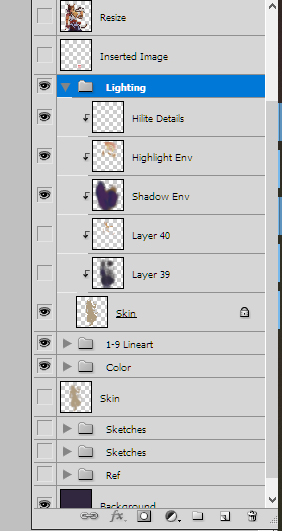
After we create flat color layers, group them together, and make a copy of the color group. Place the copy above the original color layers.
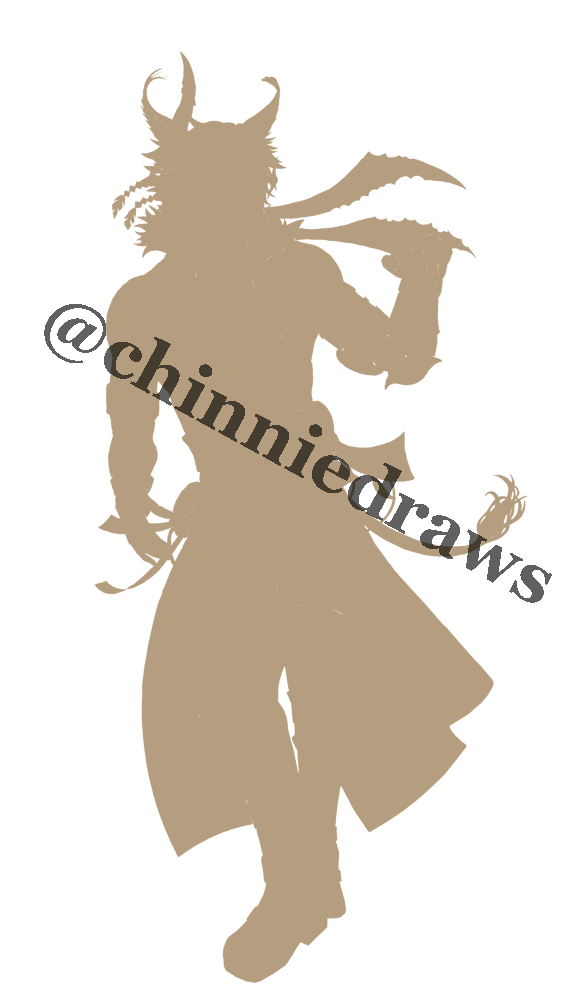
Hide the original color group. On the copy group, flatten the colors into one layer, to make a silhouette of our character. Do alpha-lock on this layer and paint this silhouette in a single color, for example neutral grey.
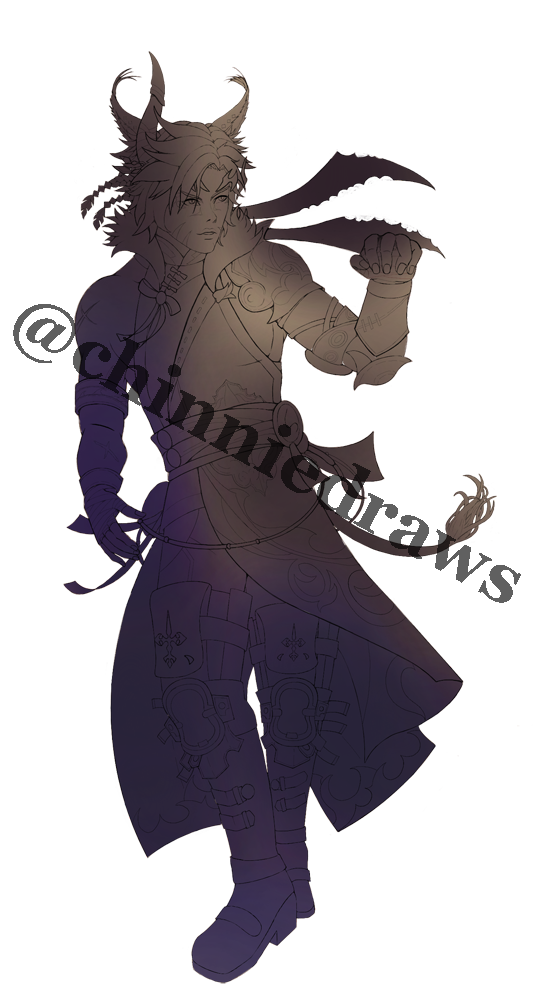
Turn on the original color layers. Then change the silhouette layer mode into a different mode, such as overlay, multiply, burn, etc. Play around with the different mode to see the different effect.
Create a new layer above the silhouette layer, and turn it into a clip layer. Pick a color for shadow, such as purple or blue. Use a large soft brush, like an airbrush, and start painting in areas that need to be in shadow.
Create another clip layer above the silhouette layer, and this time pick a color for our lighting. For example, orange or yellow for warm light. Again, use a large soft brush and start painting in areas where the light hits.
Create the third clip layer, above the silhouette and light layer. We want to add some high lights. Use a hard brush this time and make small marks in areas that have high lights. Don’t put too much highlights, or it will look unnatural.
Play around with these layers, add more paint if needed. Change the transparency level if some layer is too strong.
If needed, create new layer and do the detailing light/shadow over the other layers, but make sure they are clipped to the base silhouette layer. To make life easier, group together these lighting layers. My layer organization is something like below:
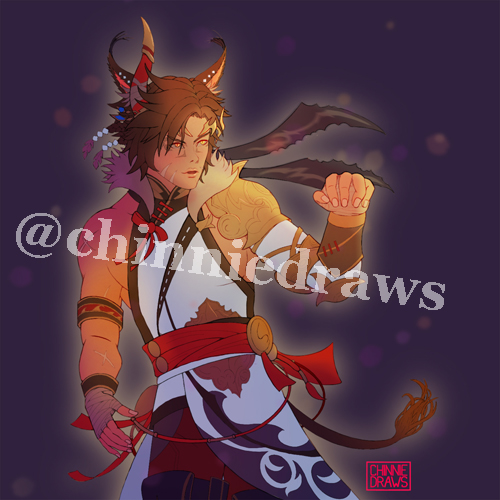
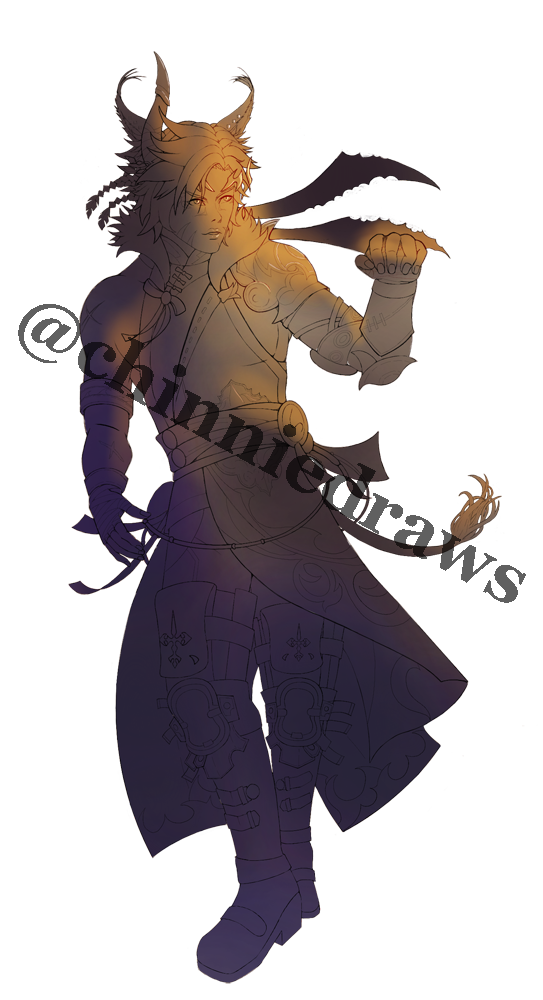
And here’s the finished version~